Download the Application Assistant onto your phone today!
We have been busy making improvements to your experience of the Application Assistant. We are excited to announce the following updates.
Some highlights include:
-
Finding students is manageable
-
Additional documents features!
-
Upload files as well as photos from your phone
-
View a document that has been uploaded
- Choosing document category and document type is easier.
-
-
Casita Accommodation directory links in app
Read on below for more detail.
Students

Find selections faster when adding or editing a student
It is now easier to locate the selections you want when adding or editing a student. When entering in the student’s Nationality, Preferred Language or Mobile No. prefix, simply type a couple of letters and then select from the options listed.

New fields added to Add and Edit Student
We want to ensure you capture a fuller picture of your student. So we have added some new fields to capture:
-
Onshore status
-
Where did the student hear about your company?
 |
| |  | | |
Casita Accommodation links under Applications
We want to help your students make the best decisions in all aspects of their overseas study. In support of this, we have added links to the Casita Accommodation Directory in the mobile app under Applications. These can be accessed after the student’s application has been submitted.
Note: Casita links are also available in the course information on the desktop app.

Documents

Upload a photo from your phone
You can now upload photos using your phone in the app. Multiple photos (up to 10 Mb) can be uploaded at once. Follow these steps to upload a photo from your phone.
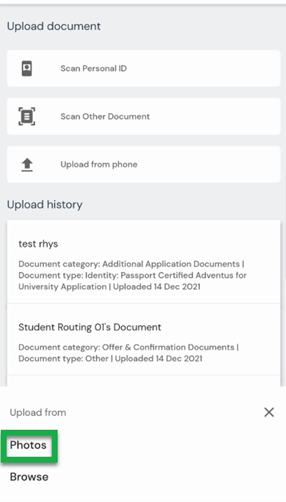
1. Tap Documents
2. Tap a student
3. Tap Upload from phone
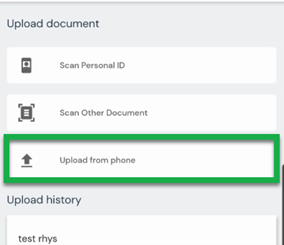
4. At the bottom of the screen, tap Photos
5. Tap the photo or photos to upload - you can select more than one.
6. Tap Select (Google/Android) or Add (iphone/ios) and your photos will appear as one document with a divider between each photo.
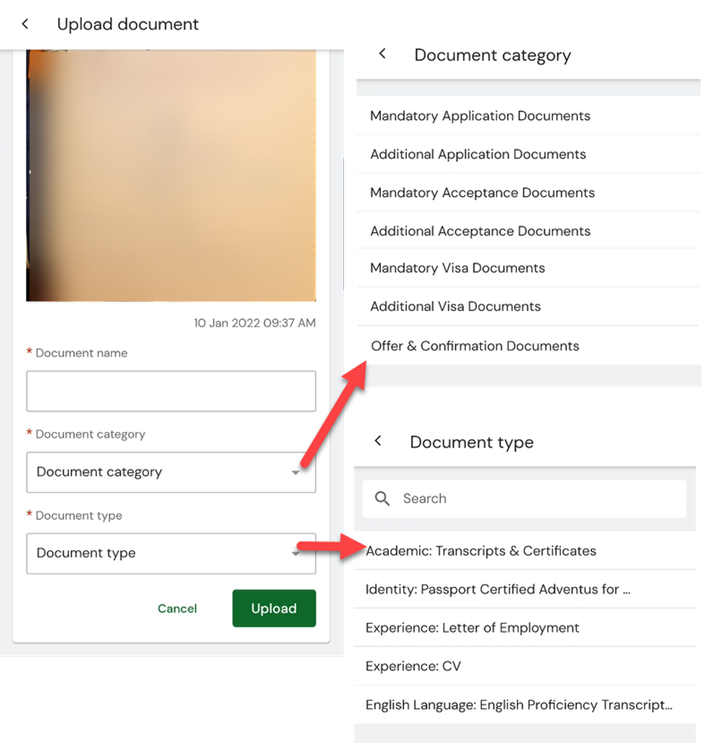
7. Enter a Document Name, Select a Document Category and the Document type
8. Tap Upload
Upload a file from your phone
You can now upload files (up to 10 Mb) using your phone in the app. Follow these steps to upload a file from your phone.
1. Tap Documents
2. Tap a student
3. Tap Upload from phone
4. At the bottom of the screen, tap Browse
5. Locate the document you would like to upload and tap to select it
6. Enter a Document Name, select a Document Category and the Document type
7. Tap Upload
Select a document category and a document type
When you select document category or document type, a new screen opens making choosing what you want easier. For document type, you can enter details in the search field to locate the document you want. Only relevant document types are shown for each category.
View a document just uploaded
Click the title of a document in the Upload history to view the uploaded document

Keep in Touch!
We're here to help!
-
General questions: reach out to your Account Manager.
-
Technical support email: technicalsupport@adventus.io. You can also continue to pass on any feedback or product ideas.
-
Questions about candidates: through the chat widget on the student in the platform.
More information is available under Contact Us in the Knowledgebase.
v1.1.0